Understanding the Temperature Tower
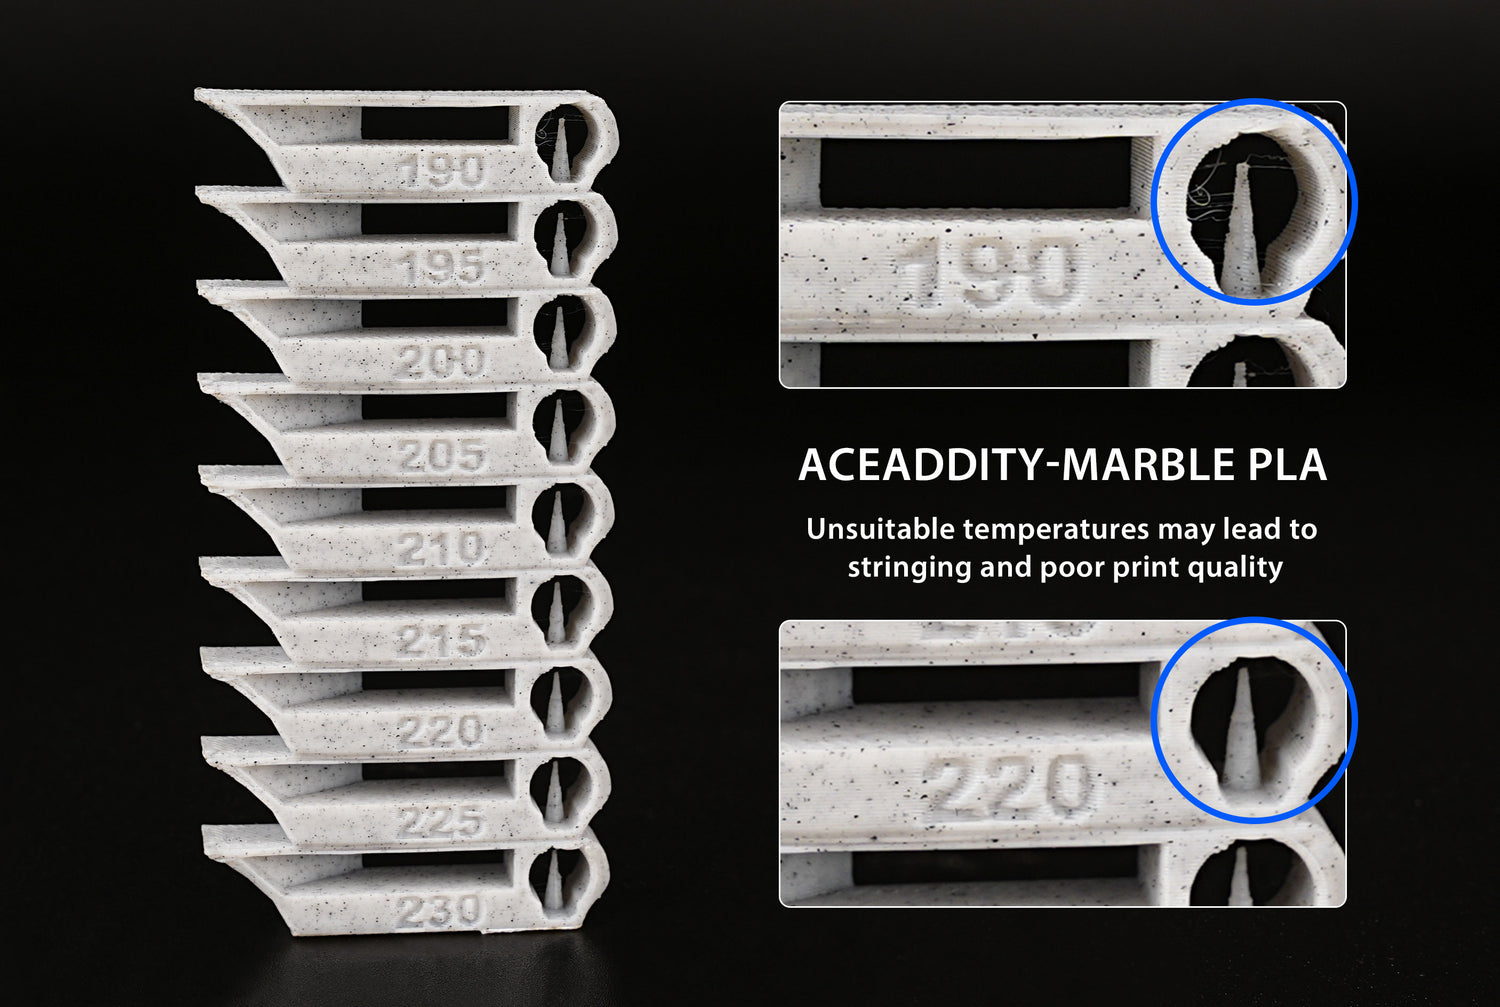
A temperature tower is a vertical structure designed with multiple sections, each printed at a different temperature. This allows you to observe how your filament performs across a range of temperatures. Typically, a temperature tower will start at the lowest recommended printing temperature for the filament and incrementally increase with each successive section.
Why Print a Temperature Tower?
1. Optimal Layer Adhesion
The temperature at which you print significantly affects layer adhesion. If the temperature is too low, layers may not bond properly, leading to weak and brittle prints. Conversely, if the temperature is too high, the filament can become too soft, causing issues like stringing and oozing. A temperature tower helps you identify the sweet spot where the layers adhere perfectly without compromising print quality.
2. Surface Finish
The surface finish of your prints is also highly dependent on the printing temperature. A well-calibrated temperature can result in smooth, glossy finishes, while an incorrect temperature can cause surface imperfections like blobs and rough textures. By examining the different sections of your temperature tower, you can determine the temperature that provides the best surface finish for your filament.
3. Detail Accuracy
Different temperatures can affect the level of detail your printer can achieve. Higher temperatures might cause fine details to blur, while lower temperatures can help maintain sharpness but might sacrifice strength. A temperature tower allows you to balance between detail accuracy and structural integrity.
4. Reducing Print Failures
Print failures are often frustrating and can be costly in terms of time and material. By using a temperature tower, you can reduce the likelihood of encountering issues like warping, cracking, or incomplete prints. This proactive approach helps you identify and mitigate potential problems before committing to a lengthy print job.

How to Print a Temperature Tower with Orca Slicer
Printing a temperature tower is straightforward. Follow these steps to ensure accurate calibration with Orca Slicer:
1. Download a Temperature Tower Model
You can find temperature tower models on repositories like Thingiverse or PrusaPrinters. Some popular models include:
- Basic Temperature Tower
- All-in-One Temperature Calibration Tower
2. Open Orca Slicer
Load your downloaded temperature tower model into Orca Slicer.
3. Set Up Temperature Variations
In Orca Slicer, go to the settings for the model and set up temperature ranges. For instance, if your filament's recommended range is 190°C to 220°C, you might set increments of 5°C. Use the "Per-Layer Settings" feature to adjust the temperature at specific heights corresponding to each section of the tower.
4. Slice the Model
Slice the temperature tower model with the configured temperature settings. Ensure that the G-code correctly reflects the temperature changes at the specified heights.
5. Print the Temperature Tower
Start the print and monitor the process to ensure the temperatures are changing as expected.
6. Examine the Results
After printing, carefully examine each section of the tower. Identify the section with the best layer adhesion, surface finish, and detail accuracy. This will be your optimal printing temperature for the filament.
Conclusion
In the realm of 3D printing, fine-tuning your printer settings for each filament type is paramount to achieving the best results. Printing a temperature tower is a fundamental yet highly effective method for calibration. By dedicating a small amount of time to this process, you can significantly enhance the quality, strength, and reliability of your prints.
At AceAddity, we understand the importance of calibration and are committed to helping you get the best out of your 3D printing experience. Join our community on Facebook and Discord to share your experiences, get tips, and stay updated with the latest advancements in 3D printing. We look forward to seeing your amazing creations and helping you along your 3D printing journey!
Join us on Facebook
Join us on Discord